Jewelry Making for Beginners: Your First Sparkle
Imagine adorning yourself or a loved one with a piece of jewelry you crafted with your own hands. The allure of creating something beautiful, tangible, and personal is powerful. If you’ve ever been captivated by the sparkle of a well-made earring or the elegant drape of a necklace, you might be wondering if jewelry making for beginners is within your reach. The good news is, it absolutely is. With a few fundamental tools, some accessible materials, and a willingness to learn, you can begin crafting stunning pieces that reflect your unique style.
Jewelry making for beginners is an accessible and rewarding craft. It allows you to express creativity, develop fine motor skills, and produce wearable art. You can start with simple projects like beading or wire wrapping and gradually explore more complex techniques as your confidence grows.
What You Need to Start Creating
Embarking on your jewelry-making journey doesn’t require a vast investment or a professional studio. A well-curated starter kit will equip you with the essentials. Think of it as building a foundation. you can always add more specialized tools and materials later.
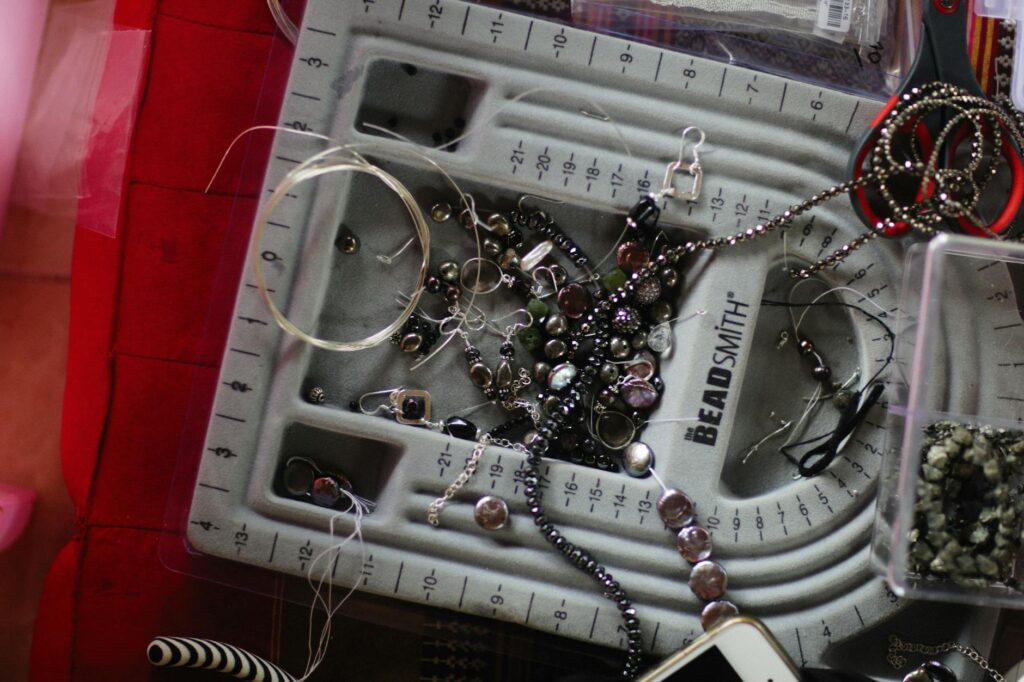
The absolute core tools you’ll need are a few types of pliers. A round-nose plier is Key for creating loops and curves in wire. Chain-nose or flat-nose pliers are indispensable for gripping, bending, and opening or closing jump rings. Wire cutters are, of course, necessary for snipping wire cleanly. Many beginner kits, like those from BeadSmith, often include these basic tools to get you started right away.
- Round-nose pliers: For forming loops.
- Chain-nose/Flat-nose pliers: For gripping, bending, and closing jump rings.
- Wire cutters: For precise cutting of wire.
- Beading mat: A soft surface to prevent beads from rolling away.
- Beading needles and thread: Essential for stringing beads.
Beyond tools, you’ll need materials. For beginners, consider using pre-made components like charms, pendants, and clasps. Beads are the cornerstone of many beginner projects. glass, acrylic, and wooden beads are readily available and come in a vast array of colors and shapes. Sterling silver and gold-filled findings (earring hooks, clasps, jump rings) offer a good balance of quality and affordability.
Essential Techniques for New Jewelers
Once you have your tools and materials, it’s time to learn some fundamental techniques. Here are the building blocks of most jewelry designs.
1. Opening and Closing Jump Rings
Jump rings are the tiny metal circles that connect components in jewelry. Learning to open and close them correctly is really important. You’ll need two pairs of pliers for this. Hold the jump ring with one plier in each hand, gripping opposite sides of the opening. Instead of pulling the ring apart (which distorts its shape), twist one plier forward and the other backward, like opening a jar. To close, reverse the motion, ensuring the ends meet perfectly to create a secure connection. According to the Gemological Institute of America (GIA) (2023), a secure closure is vital for the longevity and appearance of any piece of jewelry, preventing components from falling apart.
2. Creating a Simple Wire Loop
This technique is perfect for attaching beads to earring hooks or creating dangles. Take a piece of wire (about 2 inches long), thread a bead onto it, and then hold the wire just above the bead with your round-nose pliers. Bend the wire at a 90-degree angle over the pliers. Reposition the pliers to the tip of the bent wire and wrap the remaining wire around the base of the loop to secure it, creating a neat spiral. Trim any excess wire.
3. Basic Beading and Stringing
Here’s perhaps the most intuitive technique. Simply thread beads onto your beading wire or thread using a needle. You can create simple bracelets or necklaces by stringing beads in a pattern. For a professional finish, learn how to crimp beads. These small metal beads are used to secure the ends of your stringing material. You’ll place a crimp bead onto the wire, thread it through your clasp component, and then loop it back through the crimp bead. Use your flat-nose pliers to flatten the crimp bead securely onto the wire.
Exploring Different Jewelry-Making Disciplines
Beyond the basics, the world of jewelry making offers diverse avenues to explore. Each discipline has its own unique charm and techniques, allowing you to find what resonates most with your creative spirit.
Wire Wrapping
Wire wrapping involves using pliable wires to create intricate designs, settings for stones, and decorative elements. It can range from simple loops and coils to complex weaves. For beginners, starting with softer gauge wires (like 20-24 gauge) and focusing on basic coiling and loop creation is recommended. Brands like Artistic Wire offer a wide variety of colored and metal wires suitable for this technique.
Metal Stamping
Metal stamping allows you to personalize jewelry by impressing letters, numbers, or designs onto metal blanks. You’ll need metal stamps, a metal stamping hammer (such as those made by ImpressArt), and a steel bench block to provide a hard, stable surface. Practice on practice metal sheets before moving to your final pieces to ensure consistent pressure and spacing. According to industry guides, consistent practice is key for achieving professional-looking stamped jewelry.
Polymer Clay
Polymer clay is a versatile medium that can be molded, sculpted, and baked to create unique beads, pendants, and charms. Its malleability and lots of colors make it incredibly forgiving for beginners. You can achieve various textures and finishes, from smooth and glossy to matte and marbled. Tools are minimal. a rolling pin, craft knife, and toothpicks can get you started.
Designing Your First Pieces
While technical skill is important, good design is what elevates handmade jewelry. Don’t be afraid to experiment, but keep a few design principles in mind.
Color Theory: Understand basic color combinations. Analogous colors (next to each other on the color wheel) create harmony, while complementary colors (opposite each other) create contrast and vibrancy. Consider the overall mood you want to convey.
Balance and Proportion: Ensure your design is balanced. A large pendant might need a sturdier chain, while delicate earrings should be lightweight. Think about how the piece will sit on the body.
Simplicity: Especially when starting, simpler designs often have the most impact. Focus on quality materials and clean execution. A single, beautiful bead on a delicate chain can be more striking than an overly elaborate piece.
“The beauty of handmade jewelry is that it carries a story. Each piece is a small act of creation, a moment captured in metal and stone.” – Anonymous Artisan
Where to Find Quality Supplies
Sourcing good materials is Key for creating jewelry that lasts and looks professional. While local craft stores offer a starting point, dedicated jewelry supply retailers often provide a wider selection and better quality.
Online retailers like Fire Mountain Gems and Beads are treasure troves for beads, findings, and tools. For higher-end materials like sterling silver or precious gemstones, consider reputable online suppliers or visit local bead shops and jewelry supply stores. Always look for descriptions that specify material content (e.g., “sterling silver,” “gold-filled”) to ensure you’re getting what you pay for. Reputable brands often adhere to industry standards, such as those outlined by the U.S. Federal Trade Commission (FTC) regarding precious metal claims (check the official source for current regulations).
When you’re just starting, buying components in smaller quantities is wise. You can always reorder as you get a better sense of what you use most. Many suppliers offer starter packs or bulk discounts if you find you’re enjoying a particular technique or material.
Common Pitfalls and How to Avoid Them
Every beginner faces challenges. Recognizing common mistakes can help you overcome them more quickly and prevent frustration.
Distorted Jump Rings: As mentioned, always twist jump rings open and closed. Pulling them apart will create gaps and weaken the connection.
Weak Crimp Beads: Ensure you’re using the correct size crimp bead for your wire and that you’re flattening them securely with your pliers. If a crimp isn’t done right, the entire piece can unravel.
Rough Wire Ends: Always trim excess wire as close to the bead or wrap as possible. If the end is sharp, you can use a fine-grit sandpaper or a polishing cloth to smooth it down.
Overcrowding Designs: Sometimes less is more. Resist the urge to add too many beads or elements if it makes the piece look cluttered. Focus on a few key elements that work well together.
Frequently Asked Questions
what’s the easiest type of jewelry to make for beginners?
Beaded jewelry, such as simple bracelets and necklaces using pre-strung beads and basic stringing techniques, is generally the easiest for beginners. It requires minimal specialized tools and allows for immediate creative expression with colors and patterns.
How much does it cost to start making jewelry?
You can start making basic jewelry for as little as $50 to $100 by purchasing a beginner’s tool kit and a selection of affordable beads and findings. More advanced techniques and precious materials will increase the initial investment.
What are the essential tools for jewelry making beginners?
The essential tools include round-nose pliers, chain-nose or flat-nose pliers, and wire cutters. A beading mat and basic stringing supplies like needles and thread are also highly recommended.
Can I sell the jewelry I make as a beginner?
Yes, absolutely! Many beginners start by selling their creations at local craft fairs, online marketplaces like Etsy, or through social media. Focus on quality craftsmanship and unique designs to stand out.
Where can I learn more advanced jewelry making techniques?
Online tutorials, YouTube channels (such as those from Jewelry Making Daily), local community college courses, and workshops offered by jewelry supply stores are excellent resources for learning more advanced techniques like silversmithing or stone setting.
Your Creative Journey Begins Now
Jewelry making for beginners is a gateway to a fulfilling and creative hobby. Start with a few basic tools and simple projects, and don’t be afraid to experiment. The most important thing is to enjoy the process of bringing your ideas to life. As you gain experience, you’ll naturally develop your own style and discover which techniques and materials you love working with most. Remember, every stunning piece of jewelry began with a single step—why not take yours today?